Here are the steps to connect the plugin
Once you have created an Analytics Amplifier account, follow the steps to connect your HubSpot and Google Analytics account. You may need to get your systems administrator to help with this step if you do not have the required access. There are also a few minor website changes that need to be made. They are outlined below.
HubSpot form tweaks and Javascript installation
After you have connected HubSpot and set your Google Settings you will need to make some minor tweaks to your HubSpot forms and install a site wide script.
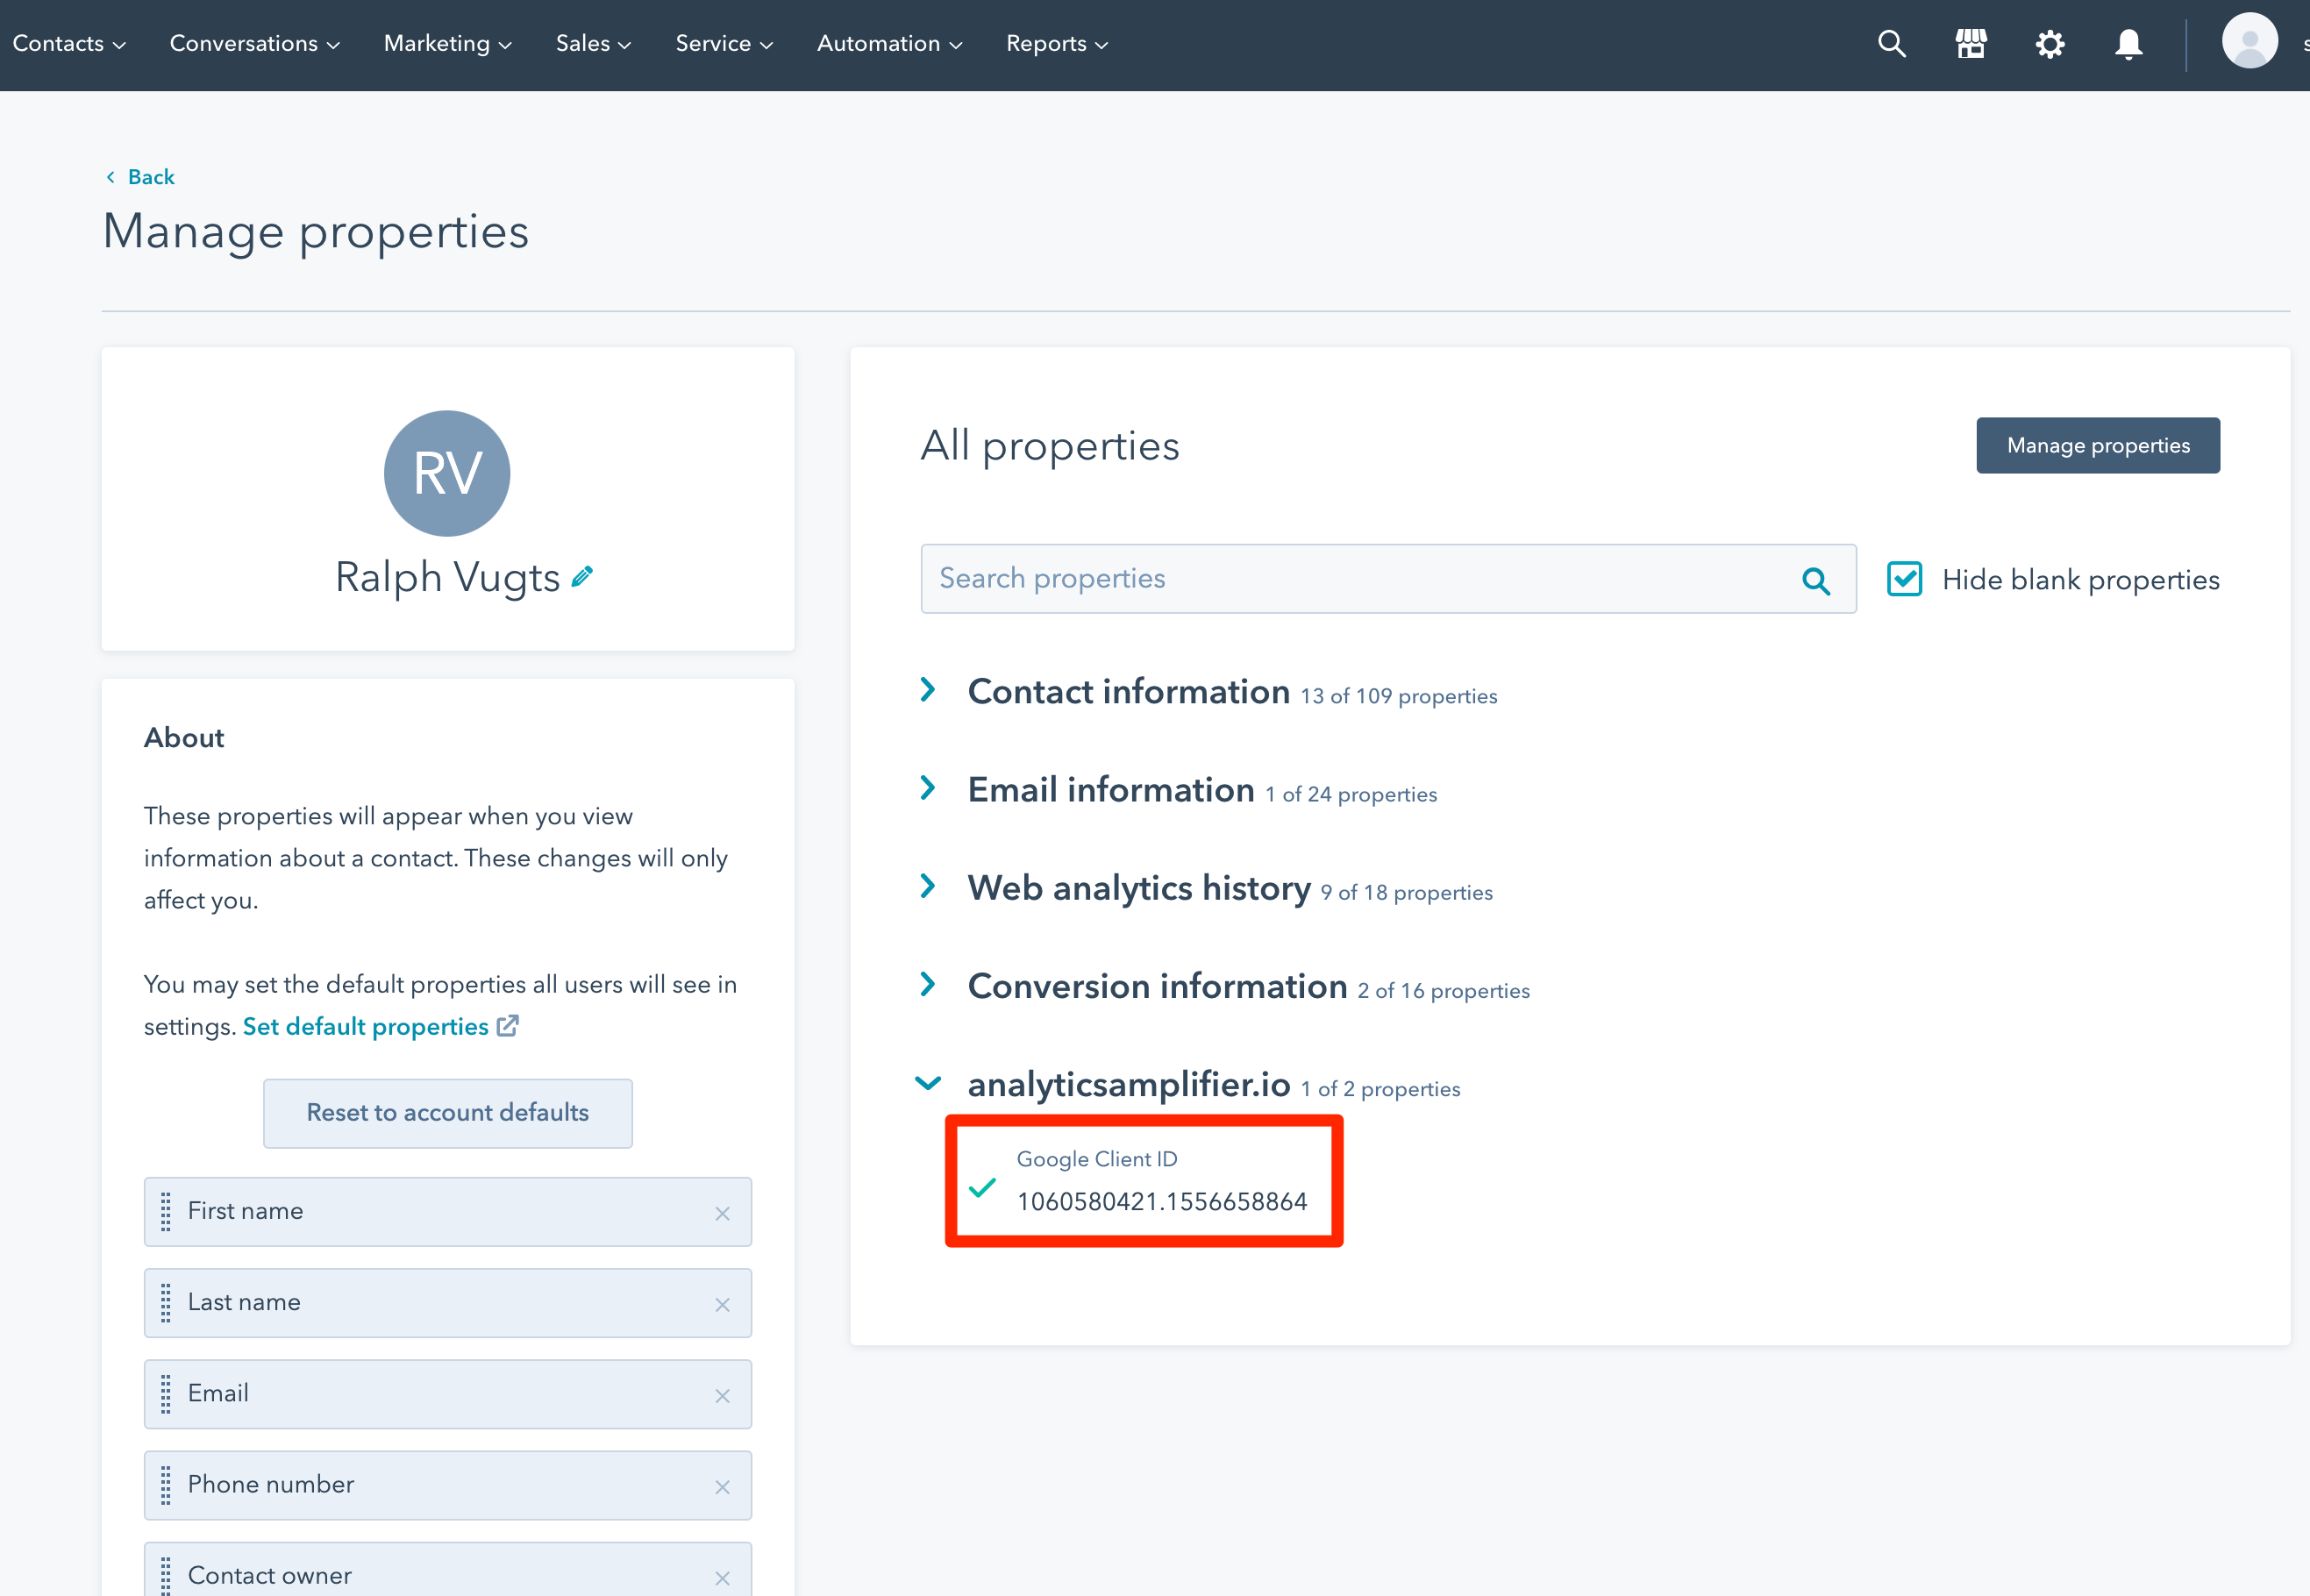
We have created a new HubSpot form property called "Google Client ID". In order for us to be able to push HubSpot events to the correct Google Analytics user we need to capture this ID any time a form is submitted.
Step 1: Form changes
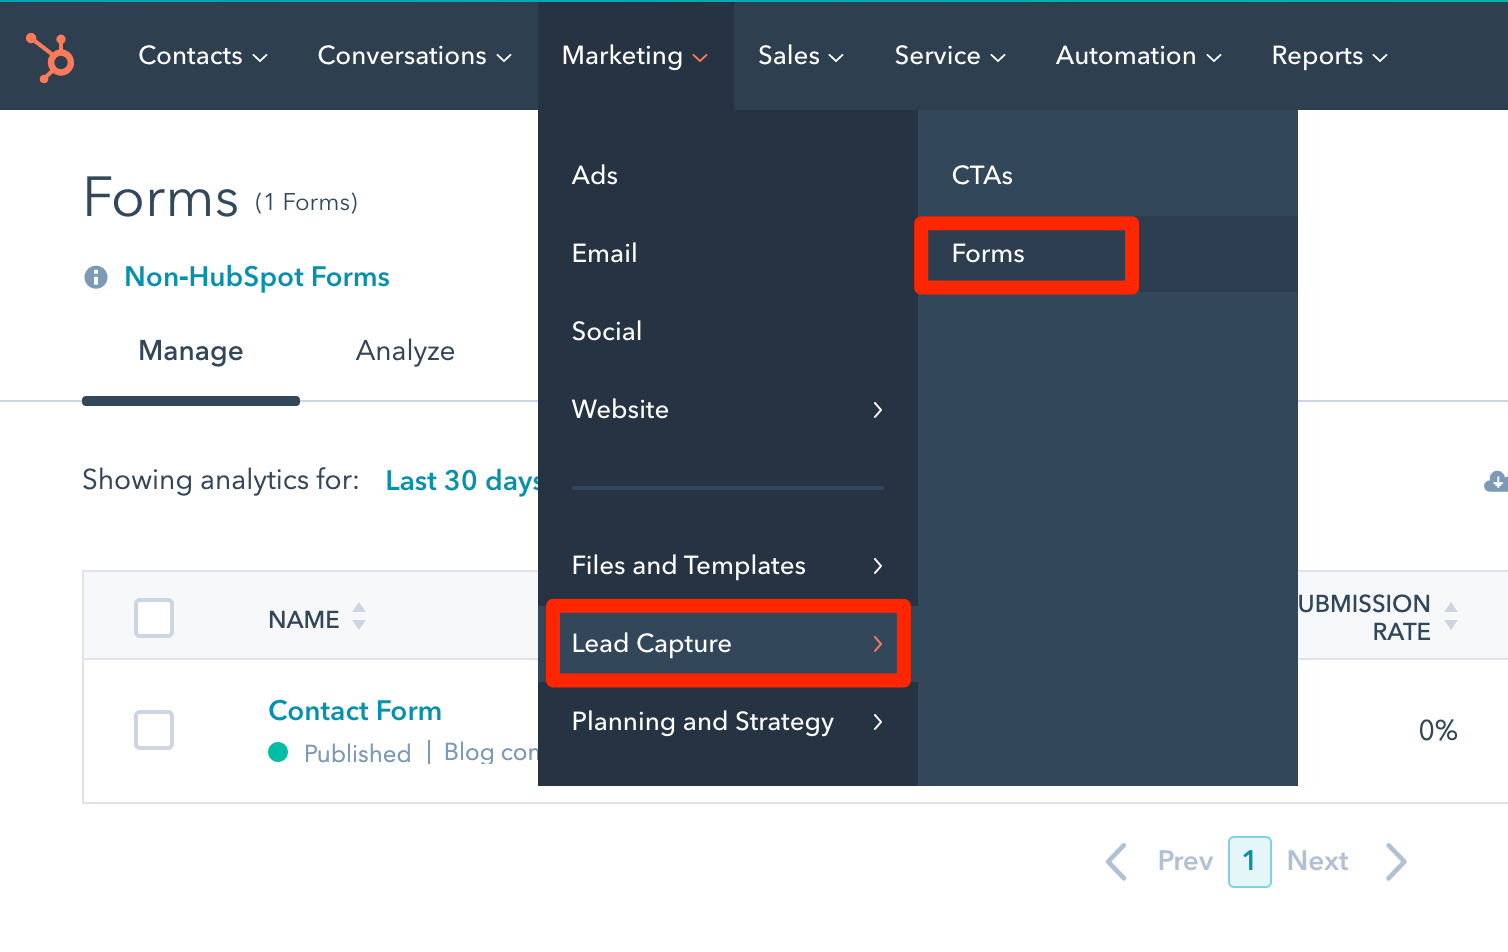
Go to your HubSpot forms and edit all the forms to include the property: "Google Client ID". Make sure you set this field to be hidden so that your users do not see this field while browsing your website.
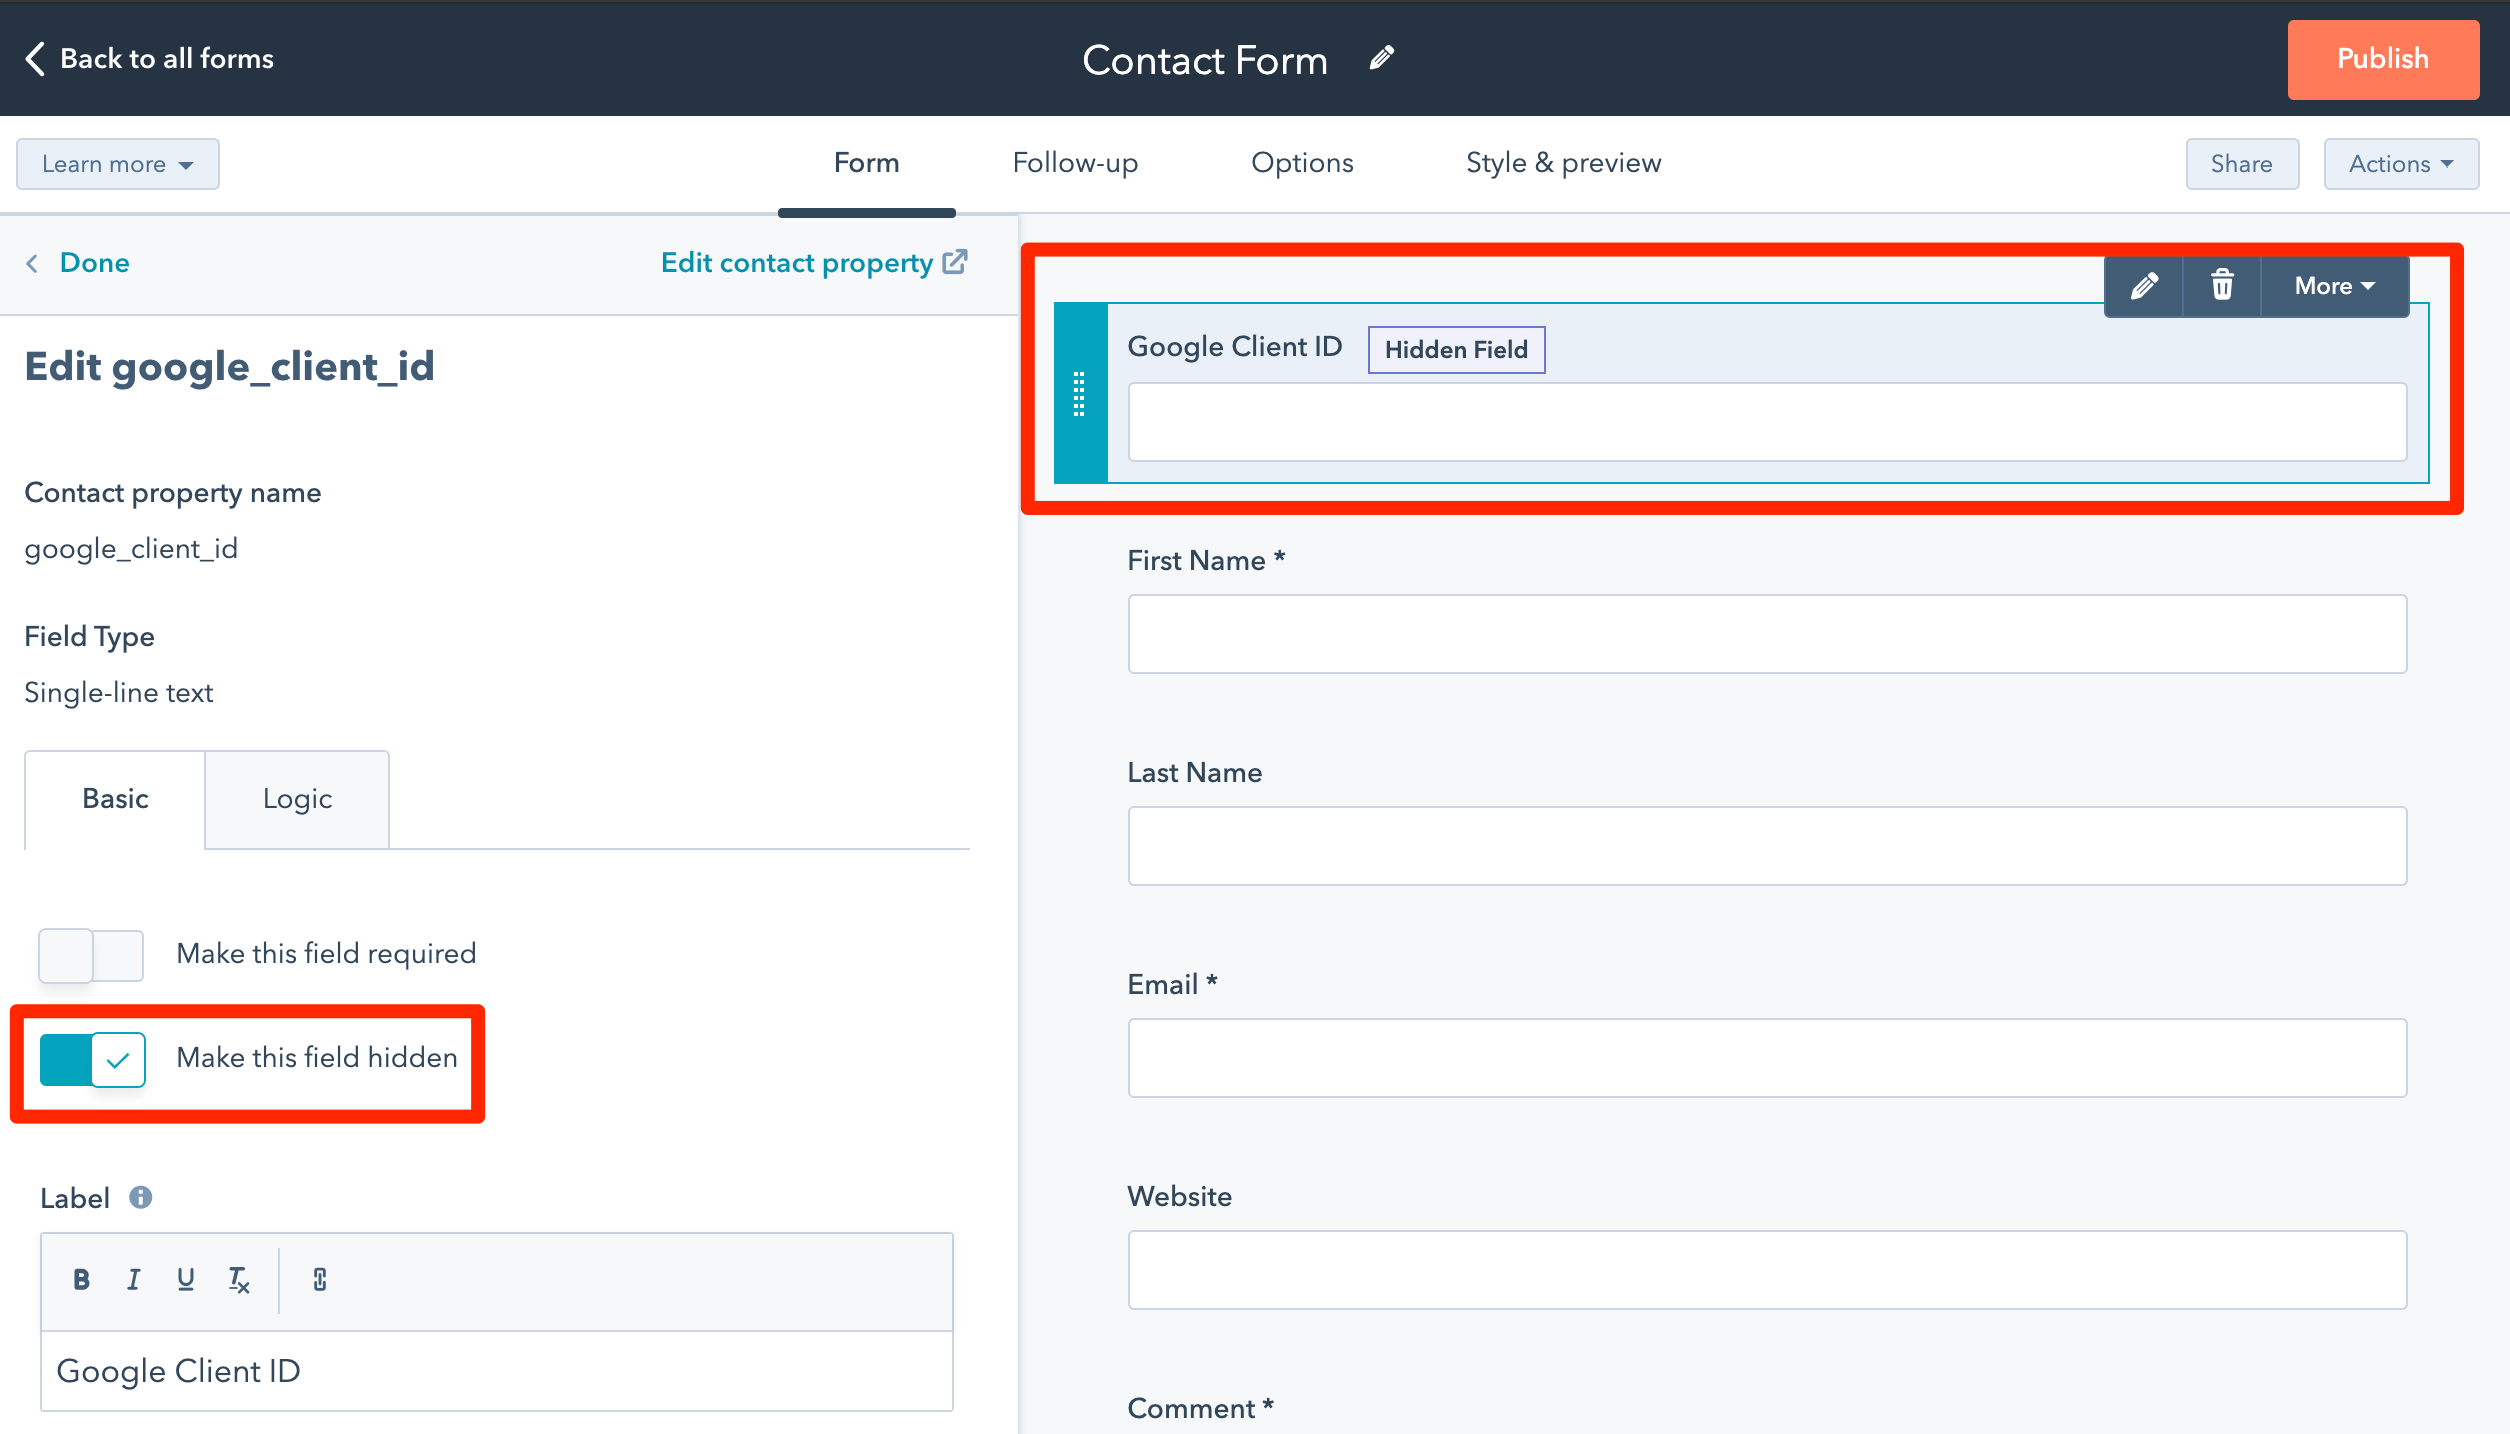
Repeat this until you have applied this new property to all the forms where you want to capture the Google Client ID.
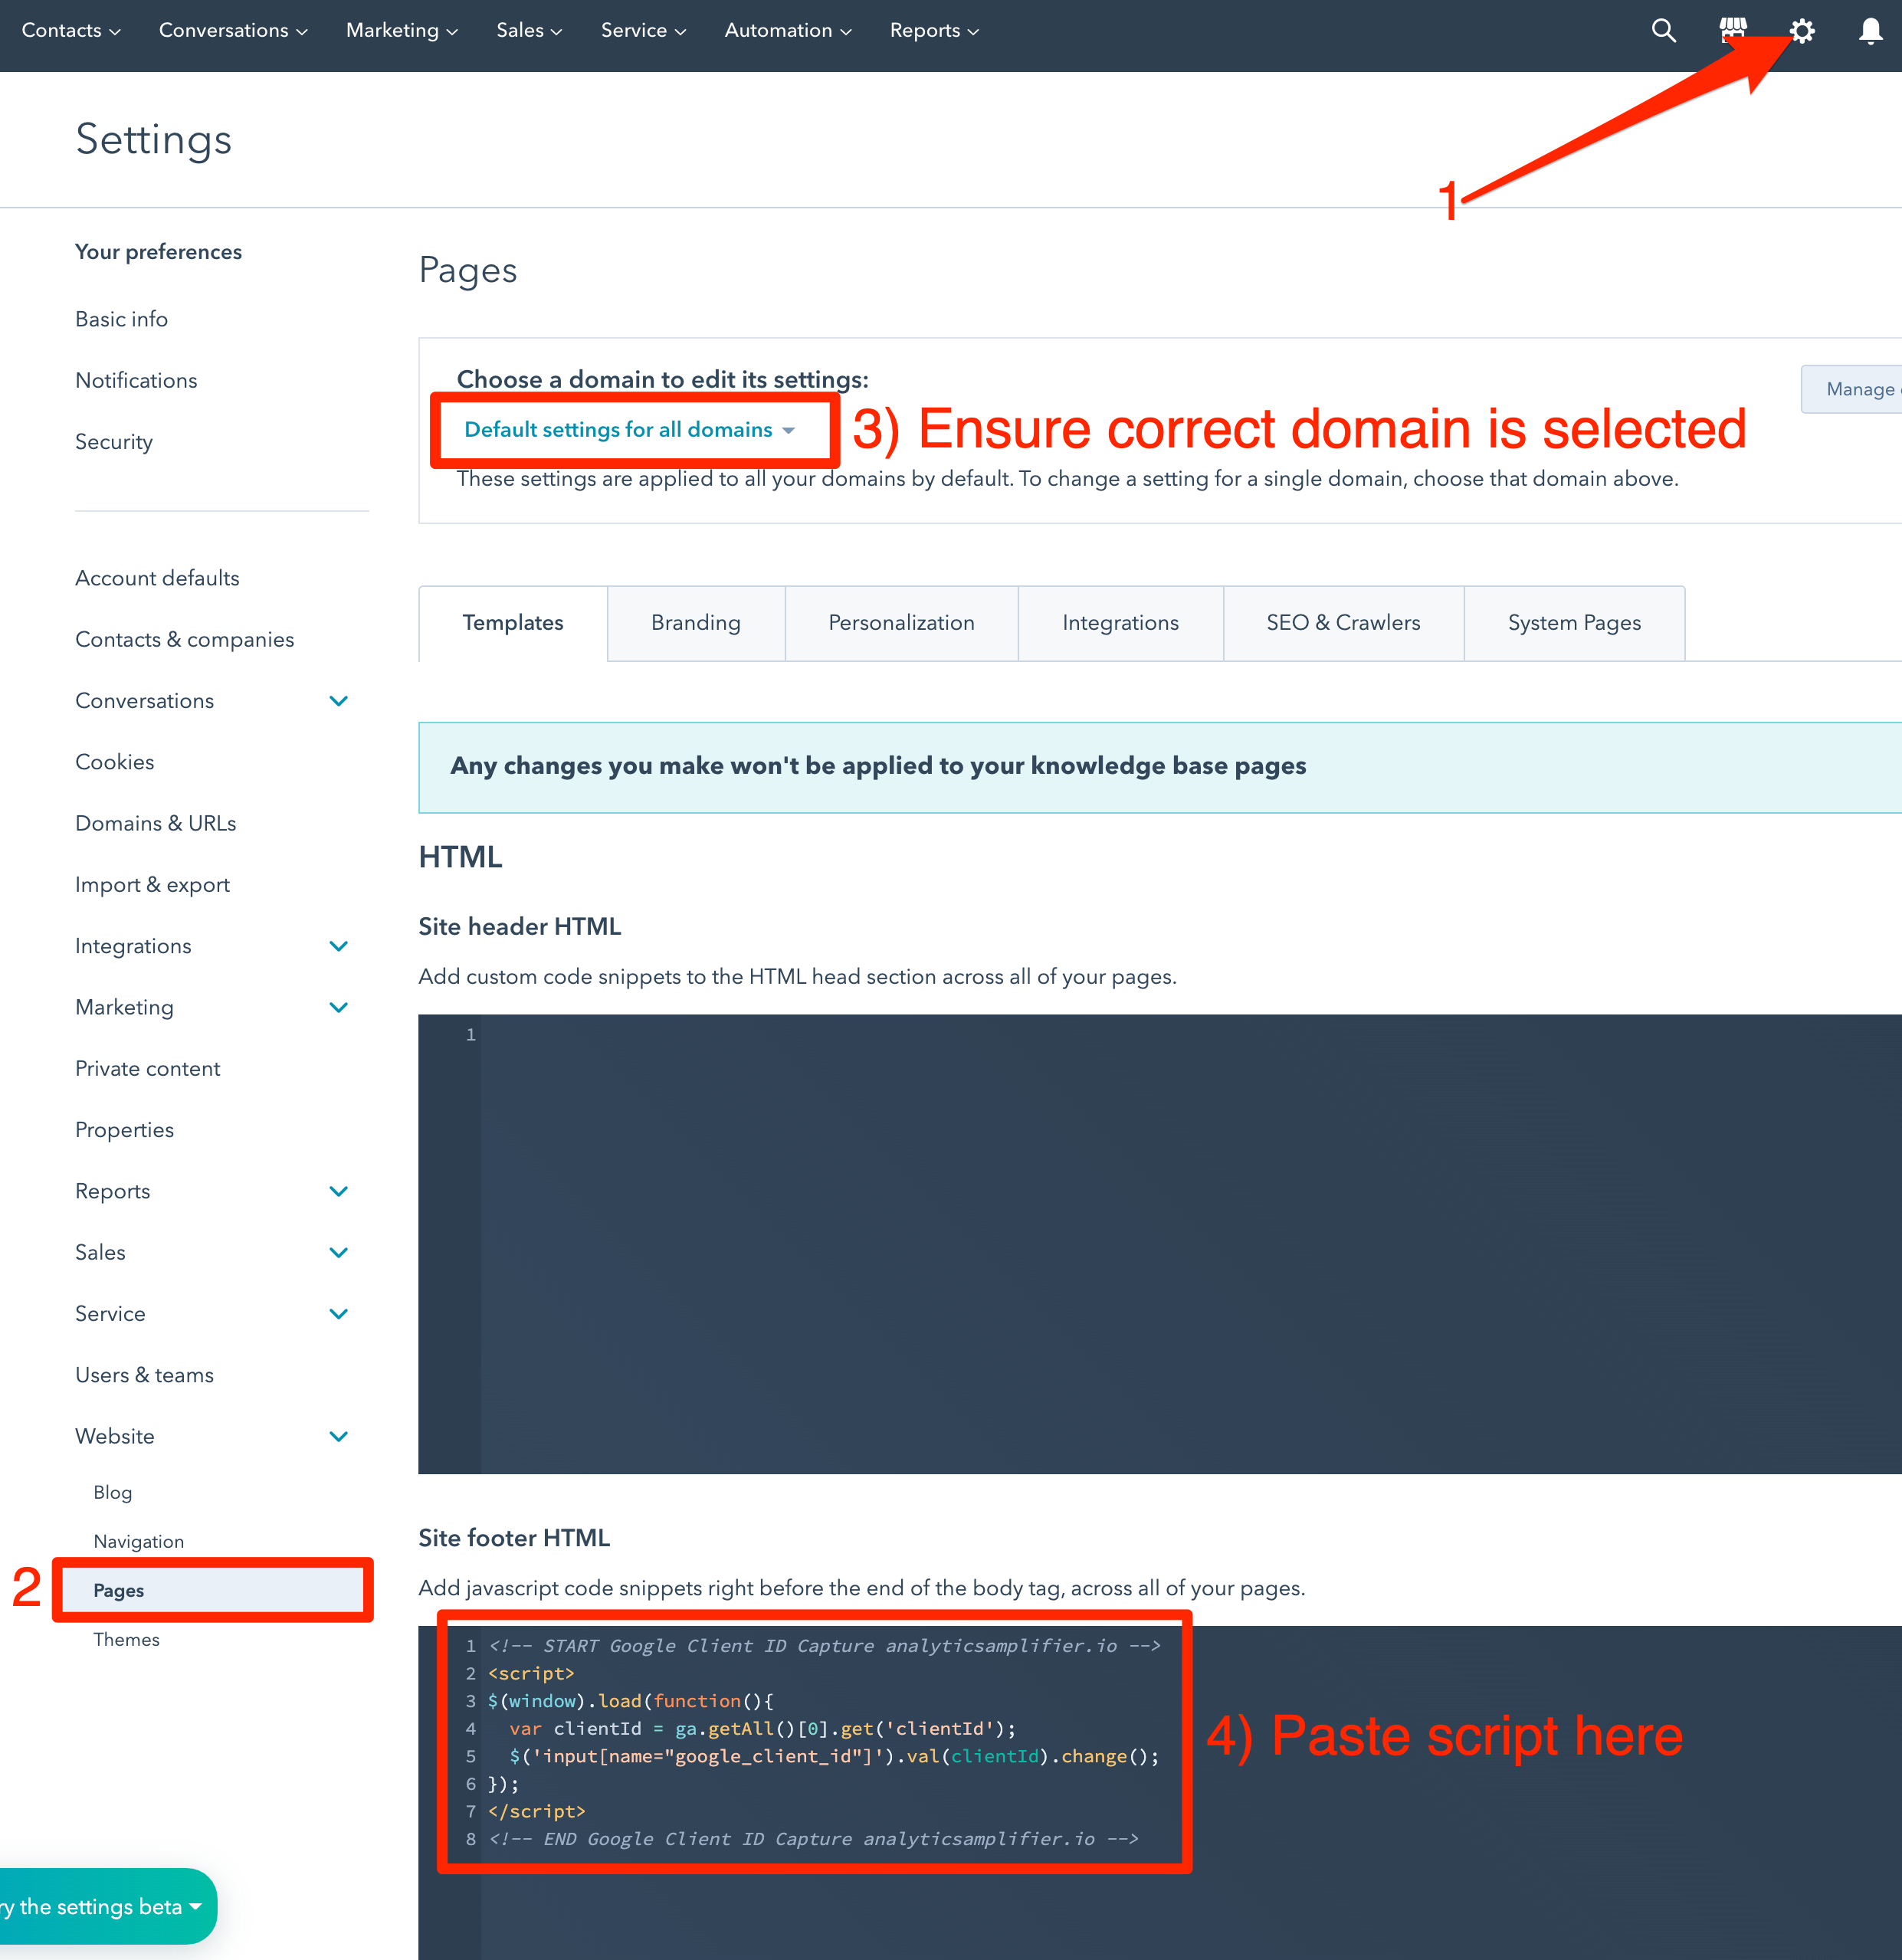
Step 2: JavaScript Snippet Install (HubSpot Pages)
In order to get the Google Client ID and insert it into your HubSpot form before submitting it you need to add the follow code to the footer of your website.
Copy and paste the full script below:
Or click here and we will generate a compressed version of the script for you.
<!-- START Google Client ID Capture analyticsamplifier.io -->
<script>
function get_ga_clientid() {
  var cookie = {};
  document.cookie.split(';').forEach(function(el) {
    var splitCookie = el.split('=');
    var key = splitCookie[0].trim();
    var value = splitCookie[1];
    cookie[key] = value;
  });
return cookie["_ga"].substring(6);
}

function setformfield(e)
{
 window.jQuery?jQuery.noConflict()('input[name="google_client_id"]').val(e).change():document.querySelector("input[name='google_client_id']").value=e
}

try{
 setTimeout(function(){setformfield(get_ga_clientid())}, 1000);
}
catch(exception)
{
 setTimeout(function(){setformfield(get_ga_clientid())}, 1000);
}
</script>
<!-- END Google Client ID Capture analyticsamplifier.io -->
Google Tag Manager
If you are using Google Tag Manager the quickest way is to simply add this script as a tag: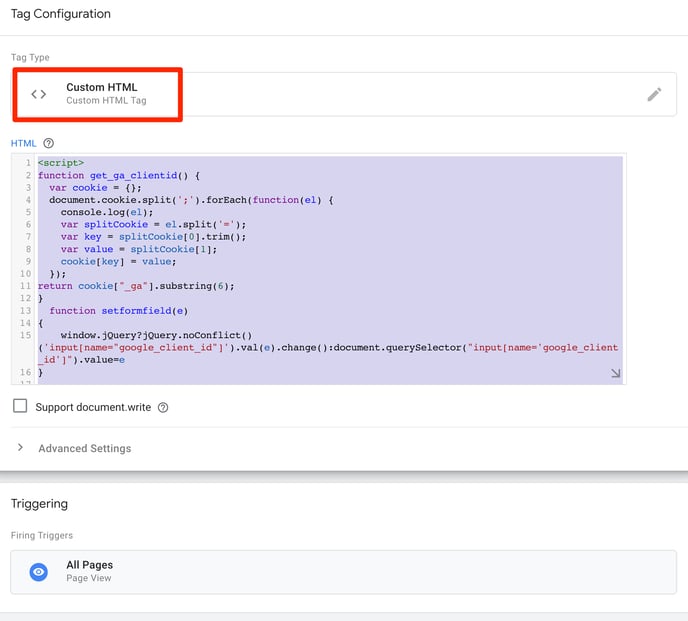
HubSpot Landing Page or Website
The fastest way to achieve this on HubSpot hosted web pages is to add it to the global site footer.
Ensure:
- The script is placed after your Google Analytics or Google Tag Manger code
- The script is after your HubSpot form.
Step 3: Test it
Go to one of your website pages and submit a form. **TIP: leave the form field unhidden during testing - you will see the Google Client ID populate without having to submit the form**
Now load your contact record in HubSpot and look for the "Google Client ID" field to see if it has been populated. If so success! Events will start to be pushed to your Google Analytics account when they occur.
Still having issues? Get in touch here.